Vmware to Proxmox VM Migration Import
In this article, I explain 2 different ways how you can perform the VMware > Proxmox migration process quickly and successfully.
Disk Extensions Virtualization Platforms:
Vmware: OVF, OVA, VMDK
Microsoft Hyper-V: VHD, VHDX
Proxmox: QCOW2, Raw
VirtualBox: VDI, VMDK
.etc.
1- Using Proxmox ESXI Import Wizard
Proxmox VE offers VM Import Wizard as of 2024. You can use this to import all VMware ESXi VMs by enabling VM migration from VMware to Proxmox.
Prerequisite: Make sure your Proxmox VE version is 8 (or above) and has the latest available system updates.
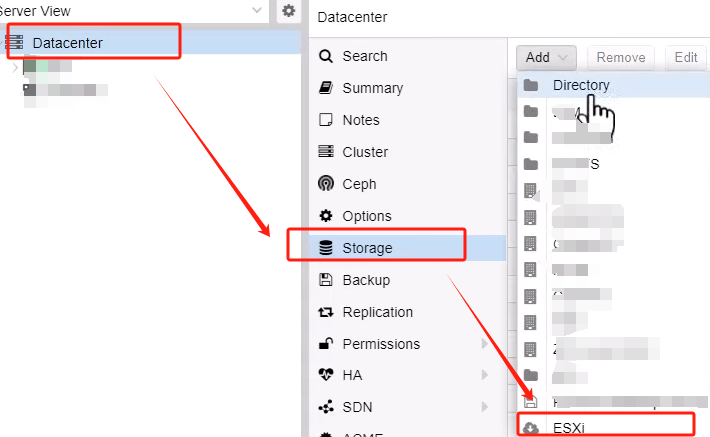
- Proxmox VE: Data Center > Storage > Add > ESXi > IP, Username, Password:
- After logging into the Esxi host: Select VMs to import > Specify Imported VMs > Import.
2- Manually VMware to Proxmox migration:
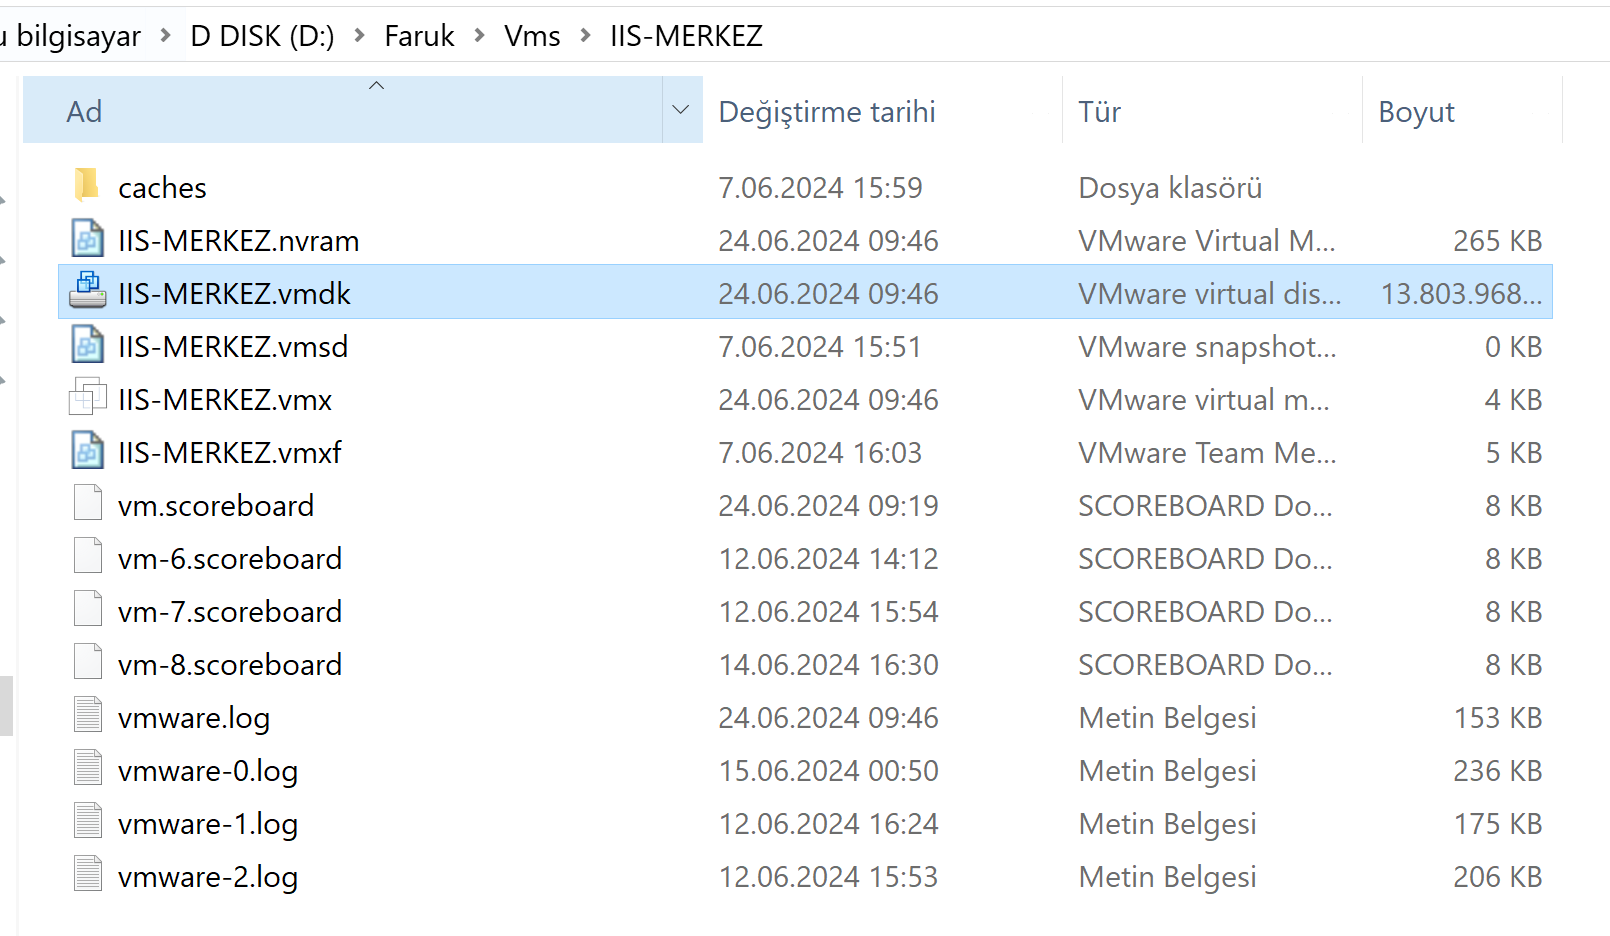
Make sure you can see your Virtual Machine's files in these directories and locations. You can transfer the VM to a conspicuous location using the appropriate commands. **You can use SCP or Winscp tool for file transfer.
Locate:
ESXI Host: ds///vmfs/volumes/457b5u78-689ocd19-2048-vy345606fgyn/
Local Drive: D:\Faruk\Vms\IIS-MERKEZ\
Create a new Proxmox VM:
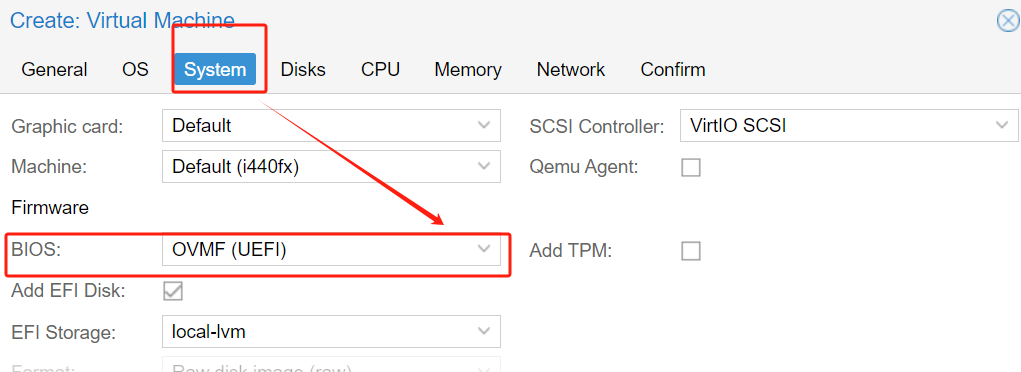
First you need to create a Proxmox virtual machine and make sure you choose the correct BIOS settings and hard disk drive type. Generally, you should select OVMF (UEFI) as the BIOS setting and set the hard disk drive type to SATA.
**Set the BIOS settings on the system to UEFI (usually OVMF (UEFI) is selected)
**You must select the Device Type as SATA for the disks.
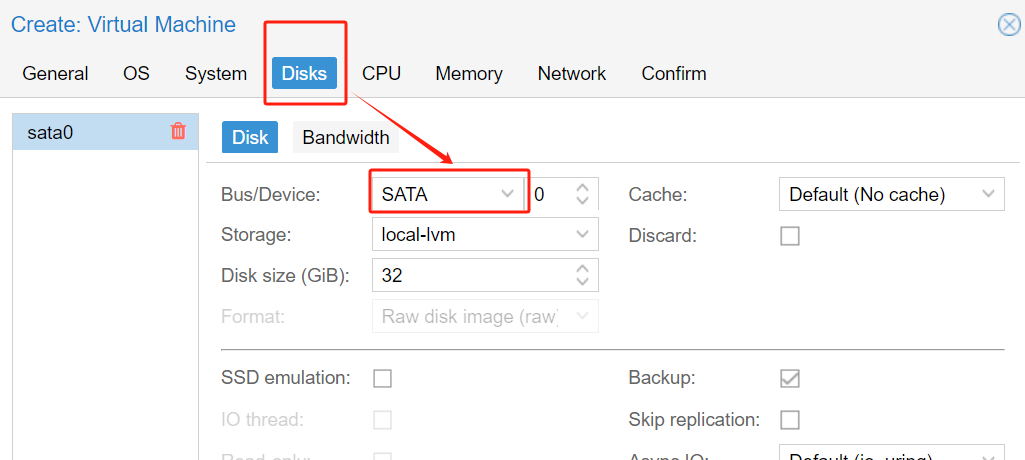
Typically, a virtual disk contains two files: *.vmdk and *-flat.vmdk. These files should be copied together to the target path of Proxmox. **You can use SCP or Winscp tool for file transfer in Proxmox.
#scp -v <source> <destination>
scp -v [email protected]:/vmfs/volumes/457b5u78-689ocd19-2048-vy345606fgyn/50/windows-app.vmdk /var/lib/vz/temp
scp -v [email protected]:/vmfs/volumes/636b5c77-974fab32-2048-bc169506deba/50/windows-app-flat.vmdk /var/lib/vz/temp
**Deleting the files copied to the Proxmox Local node after the process will prevent unnecessary disk space usage.
Import VMDK Disk:
- *** qm importdisk
- This command is used to add an existing disk file to the Proxmox VE virtual machine. This command imports the specified windows-app.vmdk file into virtual machine 117 on Proxmox VE and stores this disk in the area named "Prox-Pool".
qm importdisk 117 /var/lib/vz/windows-app.vmdk Prox-Pool --format raw
qm importdisk 117 /var/lib/vz/windows-app-DB.vmdk Prox-Pool --format raw
#Format: qcow2, raw, vmdk

#The conf. file location: VM with ID 117.
/etc/pve/nodes/pve1/qemu-server/
/etc/pve/qemu-server/
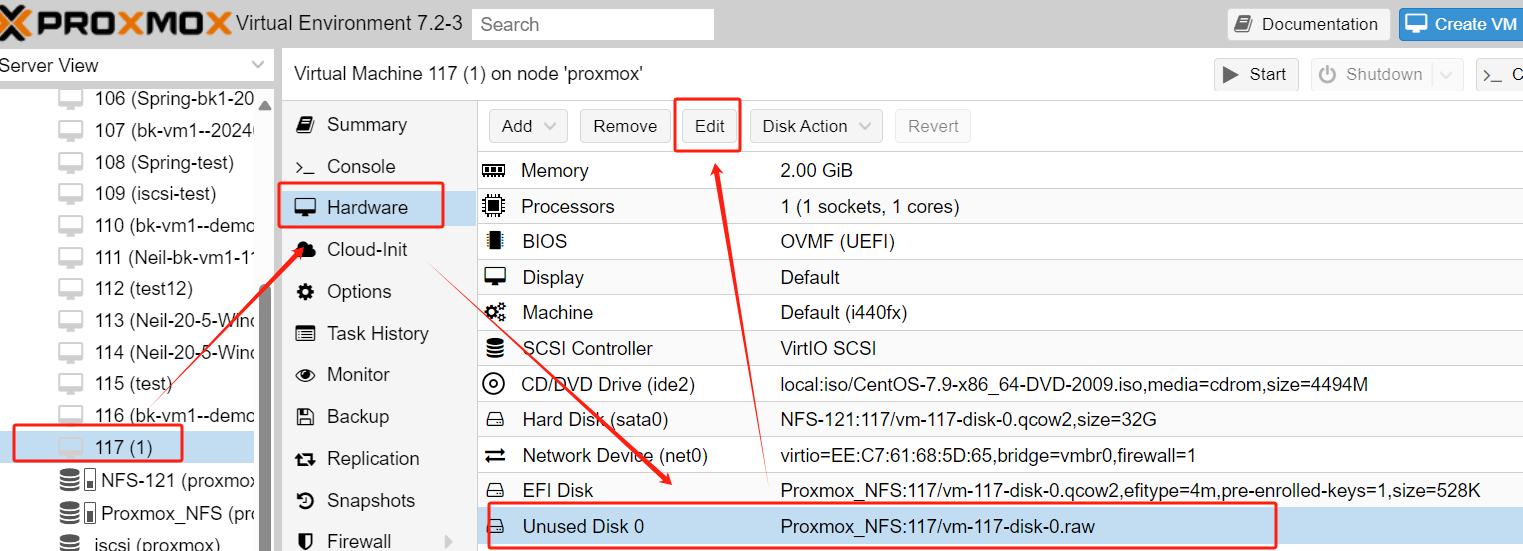
The converted vmdk disk will automatically show as “Unused Disk” in Proxmox VE. Now click on VM 117 > Hardware > Unused Disk 0 > Select Edit and make sure the bus/device is also SATA.
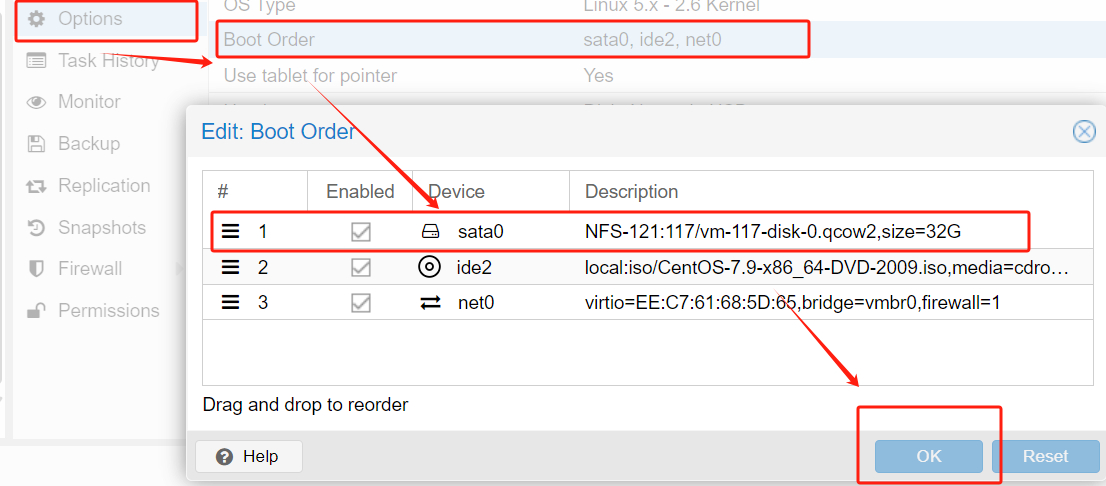
Now go to VM 117 > Options > Boot Order > move newly added disk to first > enable > press OK.
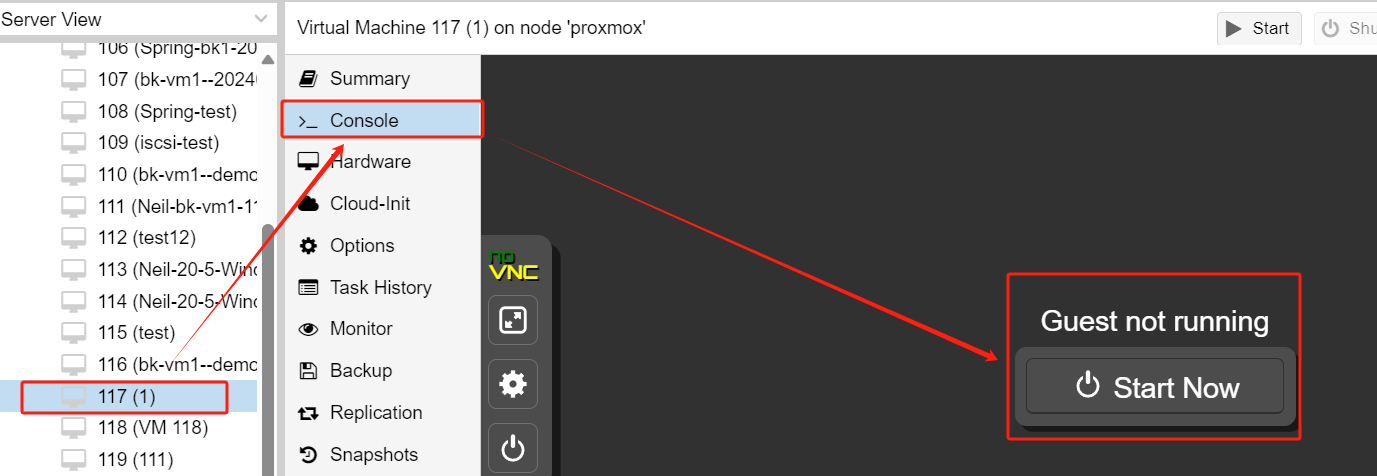
Start the Virtual Machine:
Click VM 117 > Console > Start Now
Vm Ops. :
#[Convert Vmdk To Qcow2, RAW]

#Disk convert and move: Local -> Prox-Pool [*CEPH]
#Format: qcow2, raw, vmdk
qemu-img convert -f vmdk /tmp/windows-app-server/windows-app.vmdk -O qcow2 /var/lib/vz/images/117/windows-app.qcow2

#Edit virtual machine config file and attach disk file:
nano /etc/pve/local/qemu-server/117.conf

#Import Ovf To Proxmox
qm importovf 117 windows-app.ovf local-lvm

#[Convert VHD to VMDK]
----------------------
Saygılarımla...