Windows Server 2019 Print Service Installation and Configuration
First of all, if I need to briefly talk about what Print Server is and what it does,
Print Server is a service that allows you to use printers without a physical connection between the printers and your PCs in a network where there are many printers on the service.
There are (2) two main types of Printers on the market:

A) Wired
B) Wireless
Print and Document Services Installation
We start the Printer Server configuration process with the installation of Print and Document Services on the Windows Server 2019 system. In Windows Server 2019, you can setup the Print Server service from the Dashboard console on Server Manager.
We choose Add roles and Features from the Windows Server Manager page.
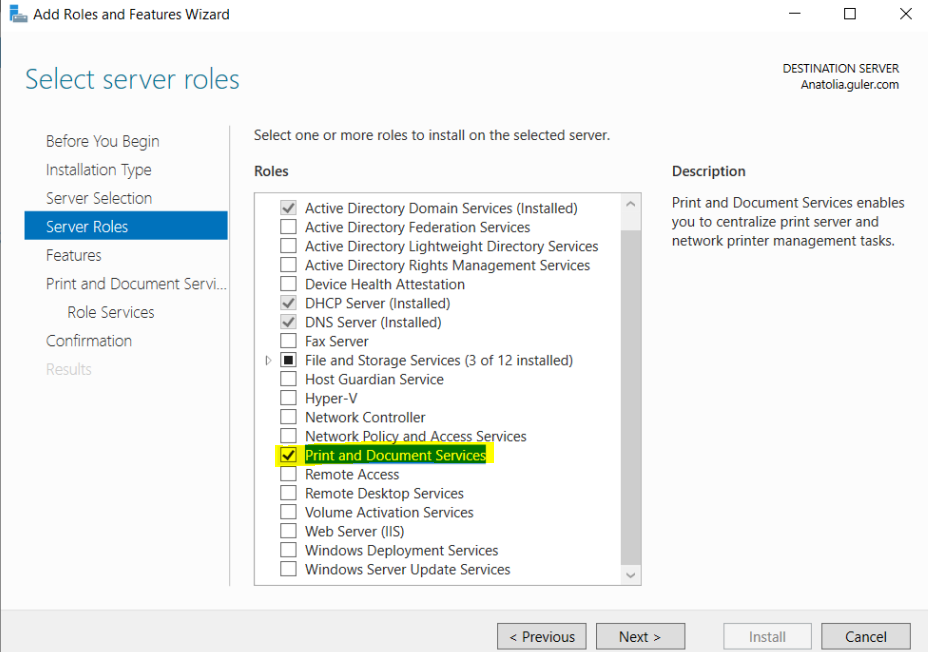
After selecting the Print and Document Services role from the Server Roles page, continue on Add Features from the screen that appears.
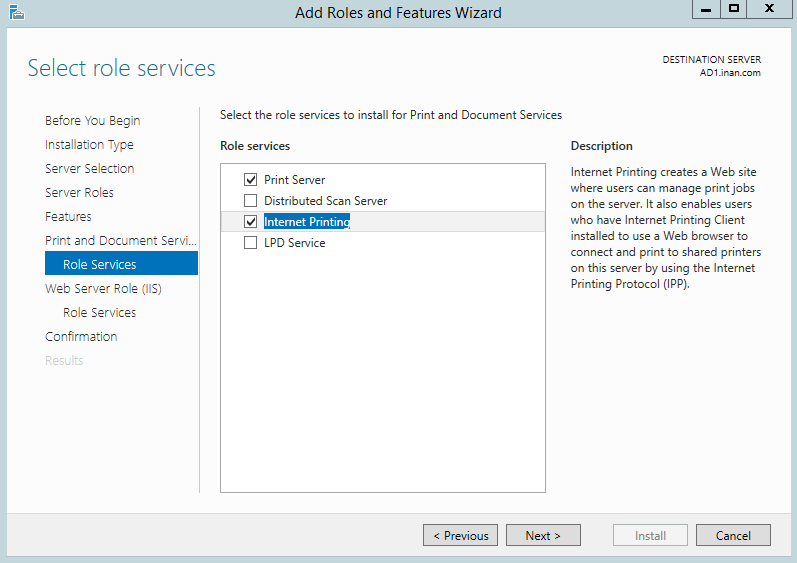
Print Server: is the main print service.
Distributed Scan Server: Allows you to collect and manage your scanned documents on the network.
Internet Printing: Allows clients to use print service from remote locations thanks to the Browser.
LPD(line printer deamon) Service: Allows Unix/Linux systems to use the printer service.

All Printers: Shows all printers.
All Drivers: We can see all the printer drivers installed on the server.
Forms: Imports custom page formats and color profiles.
Ports: It shows the existing ports and the IP addresses of the printers we have added/will add.
Deployed Printers: Shows the printers you have deployed with the GPO.
Next, let's talk about the options we encounter on any printer.
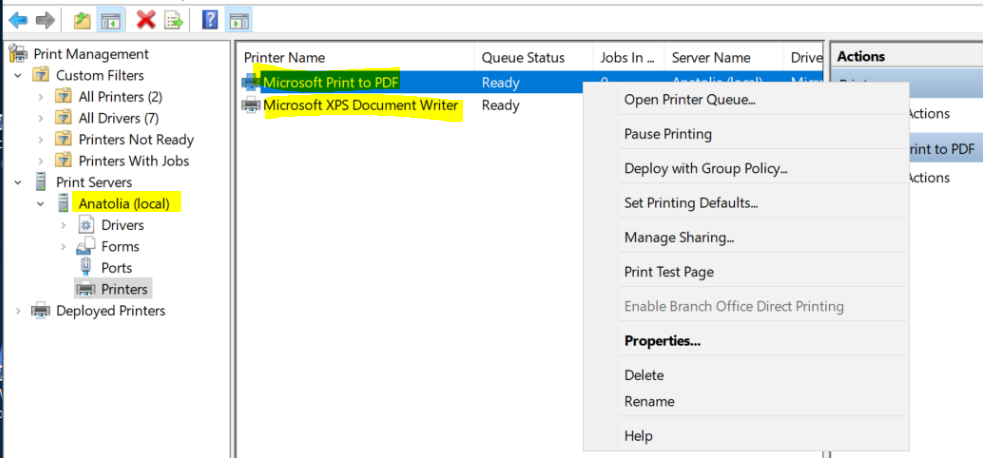
Open Printer Queue: Shows the sequential jobs of the printer.
Pause Printing: Stops all output activity of the printer.
Deploy with Group Policy: Using this option, we can distribute printers with GPO to clients in our Active Directory structure.
Set Printing Defaults: This is where we can check or make changes to the default settings of the selected printer.
List in Directory: Used to add the printer to the active directory.
Manage Sharing: This is where we can make sharing settings.
Print Test Page: It is the area where we print the test page to test the printer we have installed.
Enable Branch Office Direct Printing: Enables direct printing.
Properties: This is the section where we can access the printer properties.
Delete and Rename: we can change the name of the printer or delete it completely.
What are the printer connection types?
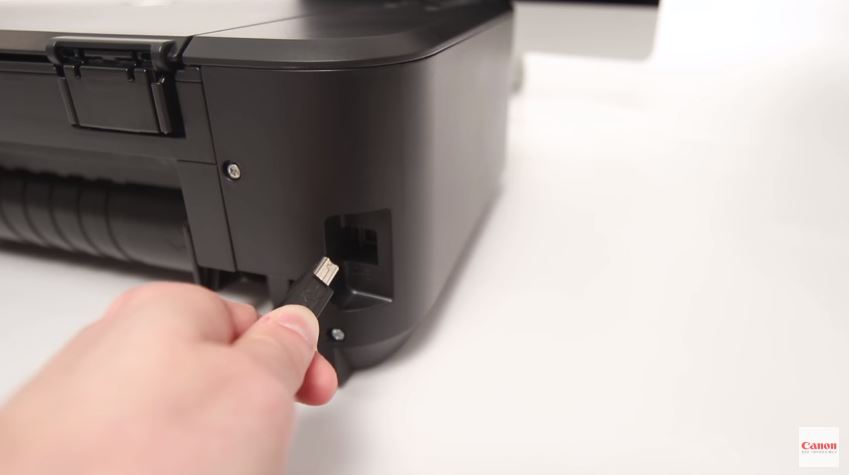
Ethernet: Printers with a network card use this connection type. Ethernet technology provides faster and more stable output by using TCP/IP protocol.
Large institutions with a high number of users and printer usage prefer this connection type.
Universal Serial Bus (USB):
It is the most used connection type along with Ethernet. With the latest version of USB 3.0, it has been announced that it reaches a speed of 4.8 Gbit / s. With its Plug and Play feature, it has become the standard connection method not only for printers but also for many other external hardware units.
Serial Communication (Serial Port):
Serial ports get their name from the fact that data is sent from the port in a serial format (1 bit at a time). They are also called COM ports.
Parallel Port (LPT):
Parallel ports are also known as LPT (LinePrinter) ports. This name is given because the data is transmitted in parallel (1 byte at a time) from the port. It is much faster than the serial port. It uses the port named DB25.
FireWire IEEE 1394:
Apple Computer Inc. Developed by It is used in large printers that we call pointers.
After the printer connection types, we can now move on to adding a printer.
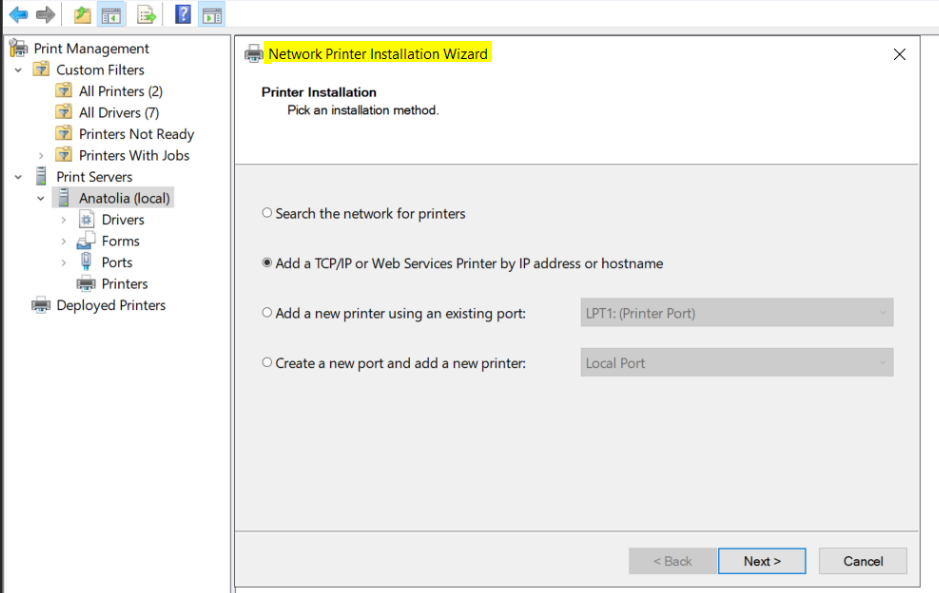
Search the network for printers: We can find the printers that exist in the network by scanning.
Add a TCP/IP or Web Services Printer by IP address or hostname: It allows us to find the IP address or hostname of a printer on the network.
Add a new printer using an existing port: Allows adding a printer over existing ports.
Create a new port and add a new printer: You can choose one of the TCP/IP ports.
By saying “Add a TCP/IP or Web Services Printer by IP address or hostname”, I will install over the IP address that I have given to the printer before. "My Printer IP:10.5.8.153"
Let's fix the ip addresses of the printers in your network, you have to do this from the interface panel of each printer itself, DHCP is not recommended for printers.
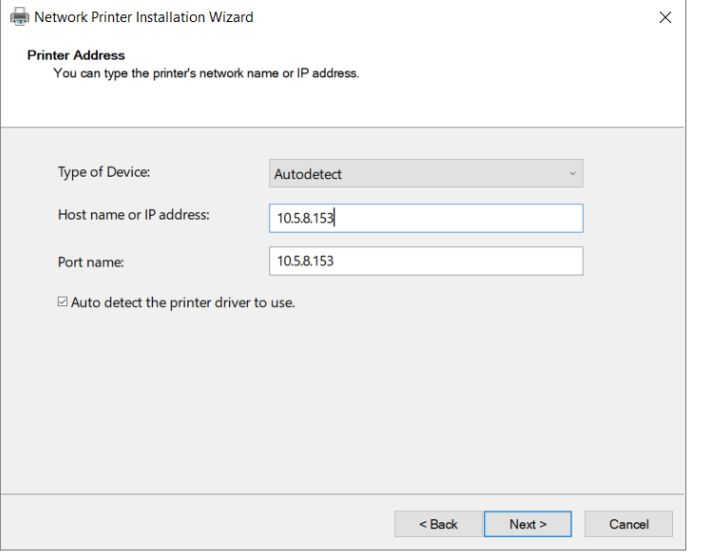
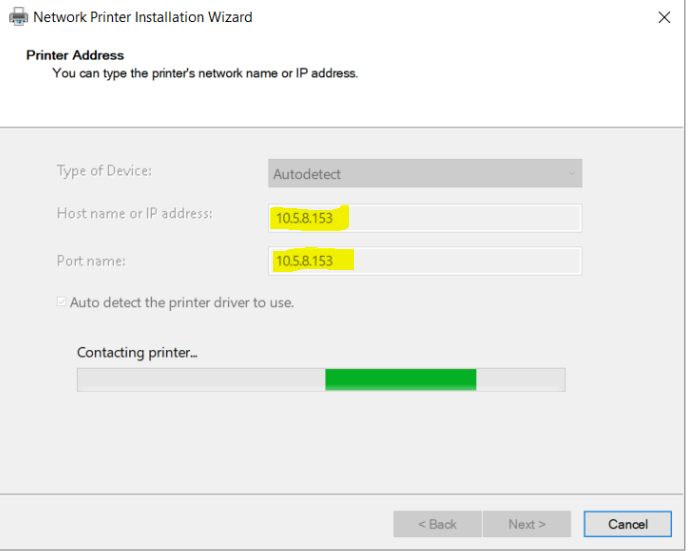
If our server can contact the printer, it will automatically detect the model and driver of the printer (if the driver is in the Microsoft catalog).
But if it cannot make contact or if the driver we need is not in the Microsoft catalog, we have to intervene.
By saying “Use an existing printer driver on the computer”, you can show one of the drivers that we have installed on the server before, or by saying “Add driver” you can import the driver from the Microsoft catalog or from outside.
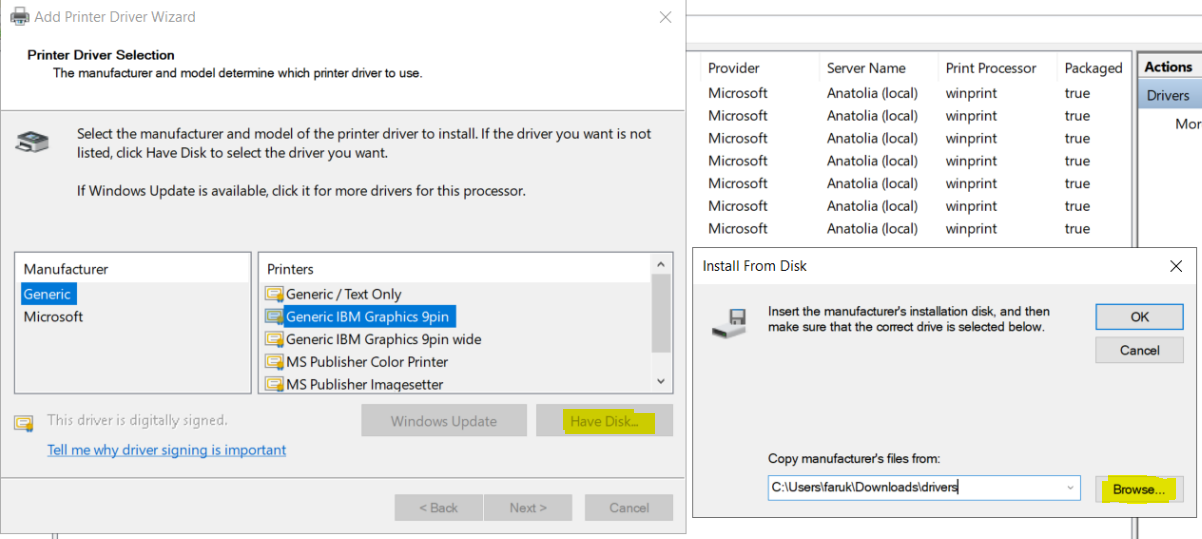
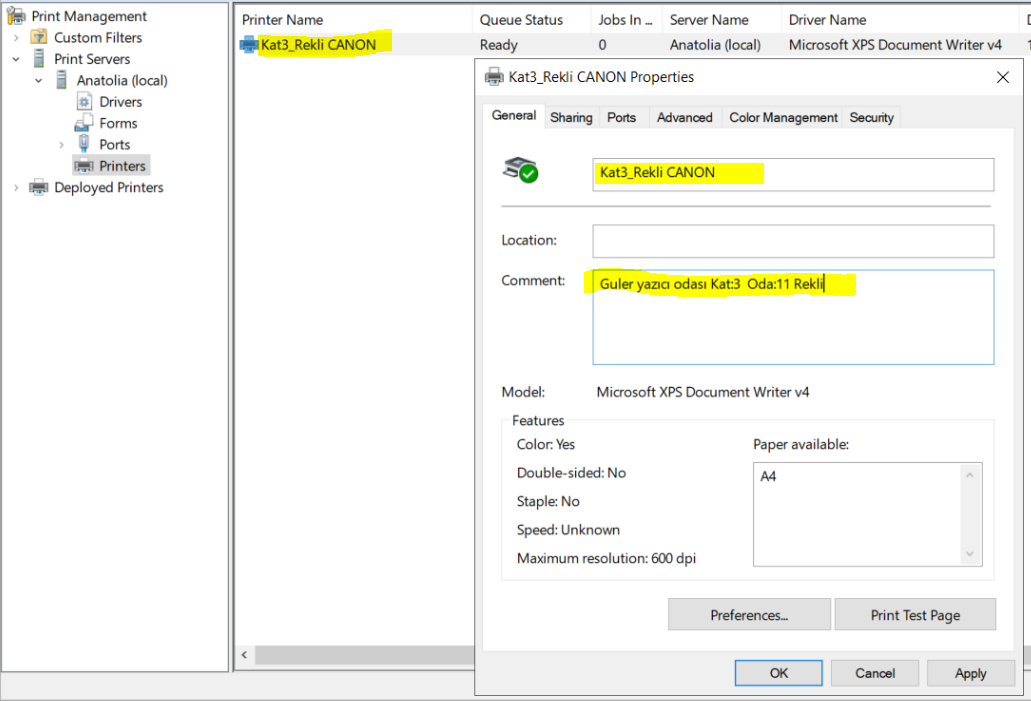
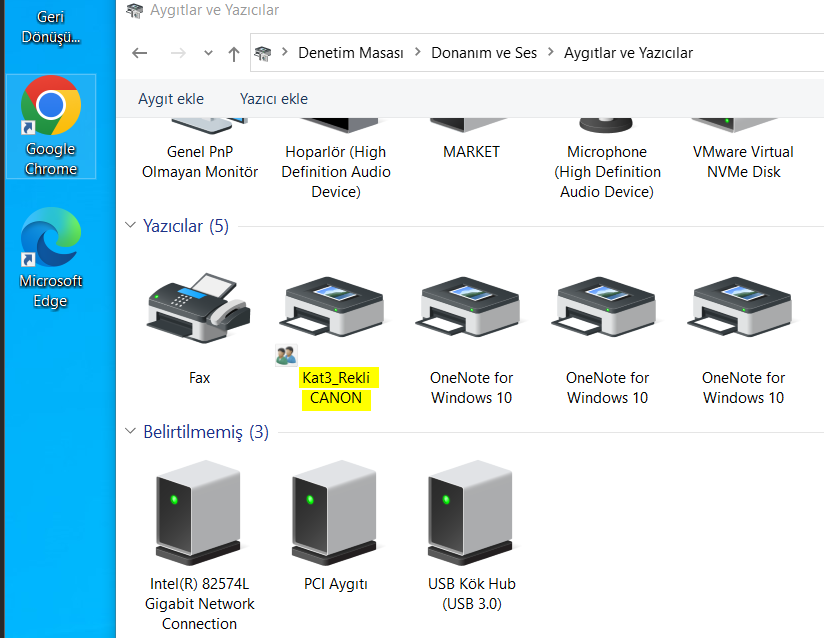
As you can see, the printer named "Kat3_Renkli CANON" has been installed.
Deploy with Group Policy (GPO) For Print Services
You can use Group Policies (GPOs) to bind shared printers to specific users, computers, and groups in an Active Directory domain. In this article, we will look at how to automatically connect a shared printer for a domain user when they log on to a Windows computer.
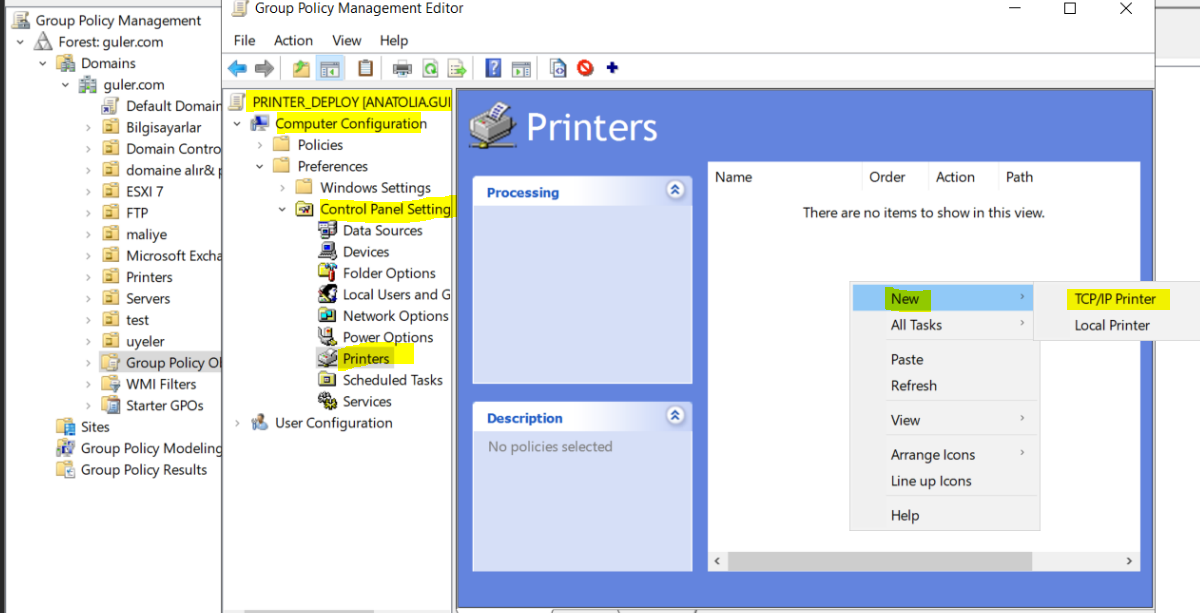
Edit the GPO and browse to Computer Configuration > Preferences > Control Panel Settings > Printers
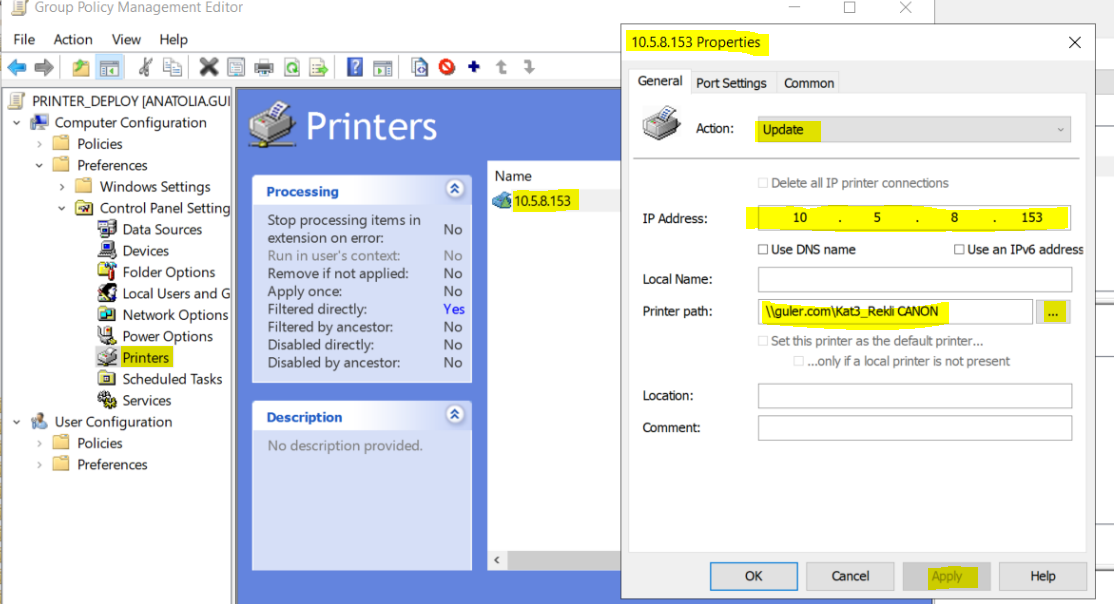
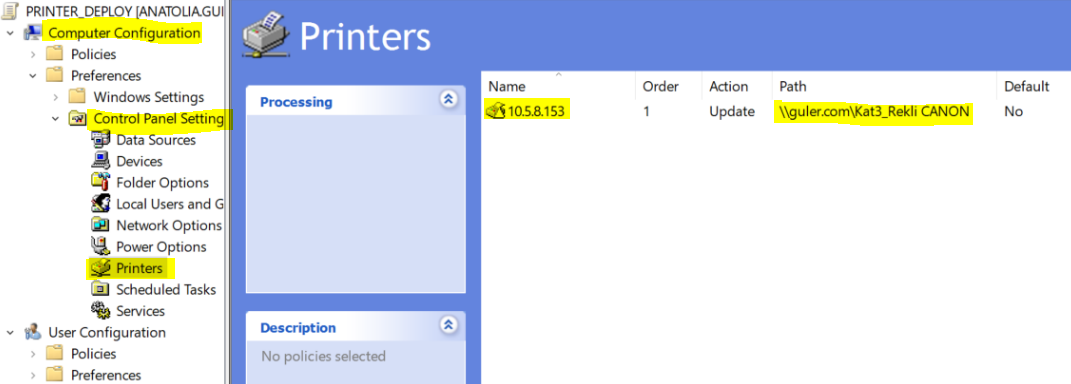
"kat_3_printers"
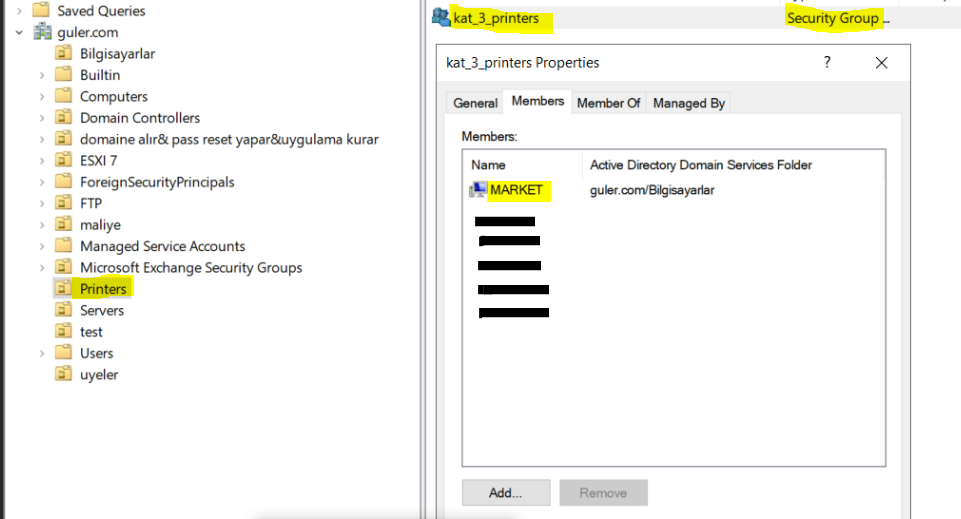
You must create a security group named "kat_3_printers".
Next, let's add the computers to which we want to distribute our printer to this security group.
Check the box “Run in logged-on user’s security context (user policy option)
Select item-level targeting and select the security group "kat_3_printers".

Run the gpupdate /force command and restart your computer.
Saygılarımla. – Best regards.