What is FastBoot and ADB (Android Debug Bridge)


1) ADB; is a versatile command line tool that lets you communicate with an Android device. It has functions such as ADB commands, application installation, debugging, taking screenshots from the device. You can also transfer files bidirectionally via ADB.
It can also perform many other actions, such as installing a custom ROM (replacing the manufacturer's Android).
Client: The client runs on your development machine. You can invoke the client from terminal with ADB commands.
ADBD (Service): A daemon that runs commands on the device.
Client (Server): Manages the communication between the client and the background program.
2) Fastboot; is a menu used on Android devices. Through this menu, you can reinstall the Android operating system on your Android device and perform the boot operations. It is a menu that is generally used to install Rom on the phone. In addition to the official version via Fastboot, you can use the Beta versions opened for developers by installing them on your device.
How ADB Works?

When you start ADB, the client first checks to see if there is a running ADB server process. If not, the server starts the process. When the server first starts, it connects to 'local' TCP port 5037 and listens for requests from the client. All clients use port 5037 to communicate with the server.
Then the server connects with all running devices and the first 16 devices establish ports with odd numbers in the range of 5555 to 5585. Note that every emulator links with an even number.
For example;
Emulator 1, console : 5554
Emulator 1, adb : 5555
Emulator 2, console : 5556
Emulator 2, adb : 5557
…………...
……….
If the server has successfully connected to all devices, you can access them using adb commands. You can control it from any client or script.
A) How to Install ADB ?
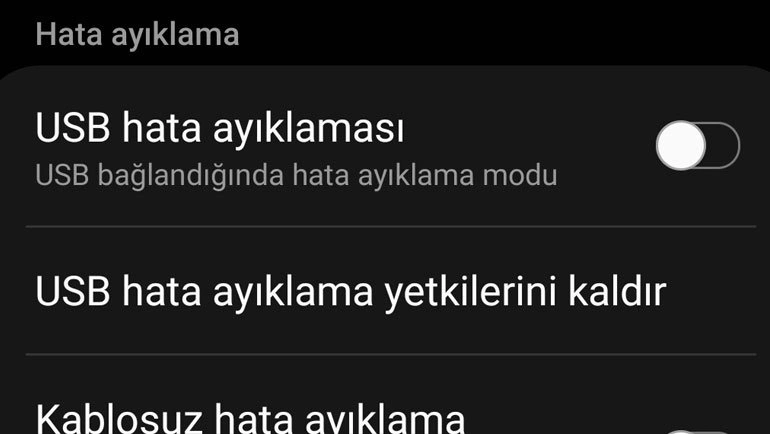
How to turn on USB Debugging?
Step #1: Enter Settings,
Step #2: Enter the system partition,
Step #3: Go to About phone section,
Step #4: Tap the Build number line 4 times in a row,
"You are now a developer" will appear on the screen.
Step #5: Go back to Settings,
Step #6: Tap on the Developer Options line,
Step #7: You can turn “USB Debugging” on or off on the bottom line,
If you're not a developer, we recommend keeping it turned off.
B) ADB setup and setup for Windows
#Adb driver download links are at the end of the article.
-Download the ADB ZIP file for Windows
-Extract the contents of this ZIP file to a folder
-Enter the extracted file
-Then, hold down Shift and right-click here and click "open command system here"
-Connect your phone or tablet to your computer with a USB cable
-Change your USB mode to file transfer mode (Some phones may want it, some don't)
-To see the devices that start ADB in the background, type the "adb devices" command in the command prompt we opened
-A warning will appear on the screen of your phone as allow or not to allow USB Debugging mode.
-Finally, enter the "adb devices" command again and you will see the device name or ip address
C) Installation (for Linux devices)
-Extract the zip content on your desktop. Open a command prompt or terminal.
-Now go to the folder where you extracted the ADB content and enter the following command:
cd /path/to/extracted/folder/
-Now you need to connect your phone to your Linux PC.
-Finally, enter the following command to check the connection between your Phone and Mac PC
"adb devices"
D) ADB setup and setup for macOS
-Download the ADB ZIP file for macOS
-Extract the contents of this ZIP file to a folder
-Open the terminal,
-Go to the location where you extracted the ADB example; cd/Users/Theguler/Desktop/adb-tools
-Connect your phone or tablet to your computer with a USB cable
-Enable file transfer mode (MTP)
-A warning will appear on your phone's screen as allow or disallow USB Debugging mode.
-Finally, enter the "adb devices" command again and you will see the device name or ip address
E) Connecting to a device via Wi-Fi using ADB:
ADB usually communicates with the device via USB, but you can also use adb over Wi-Fi after the initial setup via USB as below.
Setup to use with ADB Wi-Fi:
-Connect your Android device and your device using ADB to the same wireless network.
-Connect the device to the device you are using ADB with a USB cable
-Set the target device to listen for a TCP/IP connection on port 5555 by saying adb tcpip 5555
-Disconnect the USB cable from the target device
-See the IP address of your device by saying Settings>Wifi Settings>Advanced Connect to the device with IP address "adb connect device_ip_address"
-You can use the adb devices command to see if it is connected.
ALL ADB and FastBoot Commands:
#ADB Debugging
adb devices :Displays the list of connected devices.
adb devices -l :detailed
adb forward --list :Lists all socket connections.
adb forward tcp:xxxx tcp:yyyy :xxxx allows port forwarding to yyyy.
adb kill-server :Kills the server process.

#Wireless
adb connect :It is used to establish a connection with the target device.
adb tcpip 5555 :Sets the target device to listen for a TCP/IP connection on port 5555.
adb connect 192.168.xx.xxx :Connects to a device over Wi-Fi.
adb devices :Lists all devices connected to ADB.
adb usb :Reboots in usb mode

#Package Manager
adb install :Used to install on the target device.
adb install test.apk :You can transfer and install a single package.
adb install-multiple test.apk test2.apk :You can transfer and install multiple apks.
adb install-multi-package test.apk demo.apk :You can transfer multiple apks to the device and install them atomically.
adb install -r test.apk :You can reinstall the application while preserving the existing data.
adb install -t test.apk :You can allow test packages. (only for debuggable packages)
adb install -d test.apk :Allows version code to downgrade (For debuggable packages only)
adb install -g test.apk :Grant all runtime permissions ( Grant all permissions listed in the app manifest.
adb install --instant test.apk :Allows the application to be installed as a temporary install.
adb install --fastdeploy test.apk :It causes fast installation.
adb install --no-streaming test.apk :Allows installing the apk by always calling the package manager as separate steps.

#ADB uninstall, shell and pm commands

adb uninstall test.apk :It is used to delete test.apk from the device
adb unistall -k test.apk :Stores the data in the cache, then performs deletion.
adb shell pm list packages :Lists all packages
adb shell pm list packages -f :Related packages are listed
adb shell pm list packages -a :All known packages are listed (except APEXs)
adb shell pm list packages –apex—only :Lists only APEX packages
adb shell pm list packages -d :Lists only disabled packages
adb shell pm list packages -e :Lists only active packages
adb shell pm list packages -s :Lists only system packages
adb shell pm list packages -3 :Lists only third-party packages
adb shell pm list packages -i :Shows installation files only.
adb shell pm list packages -U :Show package Uid
adb shell pm list packages -u :Include uninstalled packages
adb shell pm list packages –show-versioncode :For Version version
adb shell pm list packages –uid UID :Shows only packages with this uid
adb shell pm list packages -user USER_ID :Shows subpackages with the specified id
adb shell pm path com.android.chrome :Print the name of the apk path of the installed package name
adb shell pm clear com.test.abc :Deletes all data associated with the package.

#File Manager
adb pull/mny/sdcard/Download/test.apk pc.apk :Copy files from your Android device
adb push pc.apk mnt/sdcard/Download/test.apk :Allows you to copy files from your local device to your Android device
adb shell ls /system/bin :Lists file paths and files
adb shell ls -a :Lists all confidential files
adb shell ls -d :Lists file paths only
adb shell ls -R mntsdcard/Download :Recursive subfolders lists
adb shell cd /mnt/sdcard/Download :You change the file path
adb shell rm /mnt/sdcard/Download/test.apk :rm is a command line utility for removing files, directories and symlinks
adb shell rm -f /mnt/sdcard/Download/test.apk :Forcibly removes without confirmation.
adb shell rm -i /mnt/sdcard/Download/test.apk :Uninstall process with confirmation.
adb shell rm -rR /mnt/sdcard/Download :Recursively removes the directory.
adb shell rm -v /mnt/sdcardDownload/test.apk :It provides information and removes it.
mkdir /sdcard/tmp :Used to create a directory.
mkdir -m 777 sdcard/tmp set permission mode :Creates a directory by specifying permissions.
mkdir -p sdcardtmp/sub1/sub2 create parent directories as needed :Creates the necessary directory structure and creates the directory.
adb shell touch mntsdcard/Download/test.txt :Used to generate timestamps of a file.
adb shell pwd :It is used to change the password.
cp sdcard/test.txt sdcard/demo.txt :used to copy the file.
adb shell mv mnt/sdcard/Download/test.txt mnt/sdcard/DCIM/test.txt :Used to move files and directories from one place to another.
adb shell mv -f mnt/sdcard/Download/test.txt mnt/sdcard/DCIM/test.txt :Moves the desired file to the desired directory and deletes the file from the old directory.
adb shell mv -i /mnt/sdcard/Download/test.txt /mnt/sdcard/DCIM/test.txt :Gives a warning if there is a file with the same name in the directory to be moved.
adb shell mv -n /mnt/sdcard/Download/test.txt /mnt/sdcard/DCIM/test.txt :If there is a file with the same name in the directory to be moved, it will not overwrite.

#Fastboot commands
fastboot devices : Shows connected devices on your PC/laptop
fastboot reboot : To reboot your device
fastboot reboot recovery : To put your device into recovery mode
fastboot oem device-info :To check bootloader unlock status:
fastboot oem unlock : If the above command doesn't work, run the following to unlock the bootloader
fastboot flashing unlock : A few OEMs can use this command to unlock the bootloader
fastboot flashing unlock_critical :Allow bootloader related partitions to be flashed as well:
fastboot oem device-info :check bootloader unlock

fastboot flash recovery [recovery.img] : To flash the recovery process on your device
fastboot boot [boot.img] : To test recovery without flashing permanently
fastboot format:ext4 userdata :To format the data partition
fastboot flash boot [boot img name] : flash flashable boot.img with fastboot mode
fastboot getvar cid : Check the phone's display CID

#Flashing ROM with Fastboot ROM zip pack
fastboot -w
fastboot update <ROM's location line.zip> : Erases device and flashes flash.zip

#ADB errors: Common error messages and solutions

Command Not Found: You made a mistake or the command is not yet available in your version of ADB. Check the command with the help of adb or update to a newer ADB version.

No Device: Your USB cable is not connected properly, the ADB interface on your phone is not working or your computer does not recognize your smartphone. Try using a different USB port, another cable, enable USB debugging, check drivers, computer and reboot your device.

Server is out of date: ADB Tools on your computer and Android version on your smartphone must be compatible. If they don't, this error occurs. Update your ADB Tools version.

Waiting for device: This error is largely the same as the No Device error. Your computer does not recognize your smartphone.
Fastboot menu key combinations for each brand:

Samsung:
Power button, Volume down and Home

HTC:
Power button and volume down
LG:
Press and hold the "phone up" and "volume up" buttons at the same time. Do not forget to connect the USB cable from the phone to the computer while doing this.
Huawei:
  Press and hold the "volume down" and "volume up" keys at the same time. On some Huawei phones they are the "phone up" and "volume down" keys
Xiaomi:
Press “volume up” and “Power” at the same time. On some Xiaomi phone models, they are the "Power" and "volume down and up" keys.
Is it safe to leave USB Debugging mode on?

USB Debugging, which enables the connection of Android devices with computers and is the companion of developers, is an option that is recommended to be turned off if not needed. Enabling USB Debugging leaves your Android device vulnerable to many dangers. Even charging your device in a public area with this feature turned on is a problem for your device. When a malicious user takes over your device, if the USB Debugging feature is active, they can access the device without the need for any PIN.
If you do not constantly connect your Android device to your computer or do not have a routine operation with USB Debugging, we recommend leaving this setting off. Thus, you will take the right move to protect your device.
What can be done with USB Debugging?
With USB Debugging, you can speed up the application development process, use advanced commands and Root your device by connecting your Android device to a computer. In addition to all this, you can also use USB Debugging to send ADB (Android Debug Bridge) commands to your Android device. In this way, you can install an APK file on the computer to the device and even perform a recovery of a device that does not work.
Adb driver and Fastboot download Links:
Windows: https://adbdriver.com/downloads/
Linux: https://dl.google.com/android/repository/platform-tools_r30.0.5-linux.zip
Mac/OS: https://dl.google.com/android/repository/platform-tools_r33.0.2-darwin.zip
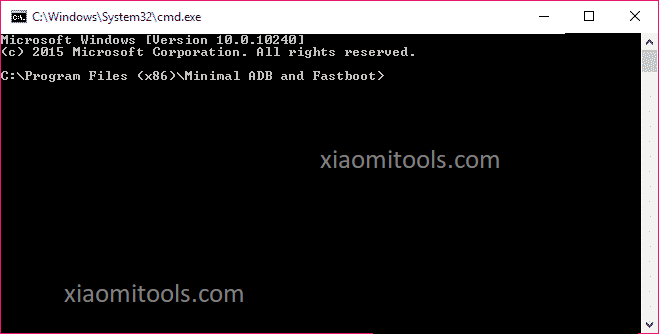
Minimal ADB and Fastboot:

Minimal ADB and Fastboot Tool is a small utility created by shimp208 (xda developer) that allows you to install the latest version of adb and fastboot files on your computer without needing to install the whole android sdk package.
Features of Minimal ADB and Fastboot Tool
Lightness : The total installation of Minimal ADB and Fastboot tool is only 2mb (for those who don't know, the android sdk package is more than 500mb).
Installer : You don't need to do manual action for minimal adb and fastboot tool, just run setup and it will install files in C: Program Files/Minimal ADB and Fastboot folder.
Quick Installation : It takes a few seconds to install on the computer as the minimum adb and fastboot installation package is almost 2mb
Download link: https://xiaomitools.com/minimal-adb-and-fastboot
Saygılarımla – Best regards